Tuesday 16 June 2009
Technical bit


next thing to consider was how to fix the end can back in place.
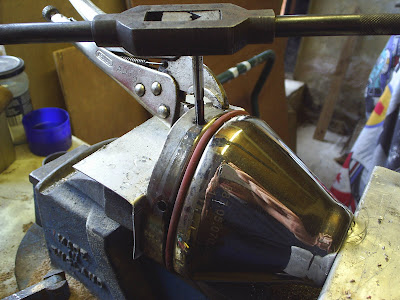
I decided to replace the pop rivets with stainless 5mm domed cap head screws. I made 3 plates drilled and tapped to go inside the end can for the screws to fix into.
The plates can be held in place with tape during assembly untill the screws are in, the tape will burn away later.
Pushing home
packing
.JPG)

Before the packing can be fitted the perf pipe had to be cut to the exact length. Not too long that the end can can't be pushed home not to short that pipe is insecure, about 2mm of end float.
Next job was to wrap the pipe with stainless steel wool, this will prevent the fibre glass from being blown out. Once thats's in place the top quality fibre glass wadding was wrapped (£25) enough to fill the can.
Monday 15 June 2009
End cone
Perforated pipe

I bought 2 lengths of 38mm perforated stainless steel pipe each 600mm long (£50). This pipe is too small to fit over the 45mm stub in the inlet cone but just small enough to fit inside the outlet of the end cone.
I made a steel band which would slide over the inlet stub and then welded it to the perforated pipe.
Sunday 14 June 2009
Hard part
Now comes the hard part.
Drill a ring of 5mm holes around the flange as close together as pos. The remaining material joining the two can then be cut with a sharp chisel. Hey presto a clear path for gas flow.
Baffles
Saturday 13 June 2009
Restricter removal

After removing the cans from the bike the first job was to split the end cones from the main silencer body.
These top quality cans are made with the finest aluminium and stainless steel components and all tools/cutters must be top drawer.
The rivets are stainless and must be drilled out, i used a cobalt drill and still had to sharpen it half way through.
Once the rivets were gone the end cones could be pulled out and the restricter revealed.
KTM Duke 2 exhaust mod's
Subscribe to:
Posts (Atom)


